How to make perfect dosa batter at home: 5 easy tips
Getting dosa batter right is the secret to crispy, golden dosas. From choosing the right rice and dal ratio to perfect fermentation, small steps make a big difference. Follow these 5 simple tips to make smooth, airy, and restaurant-style dosa batter at home.
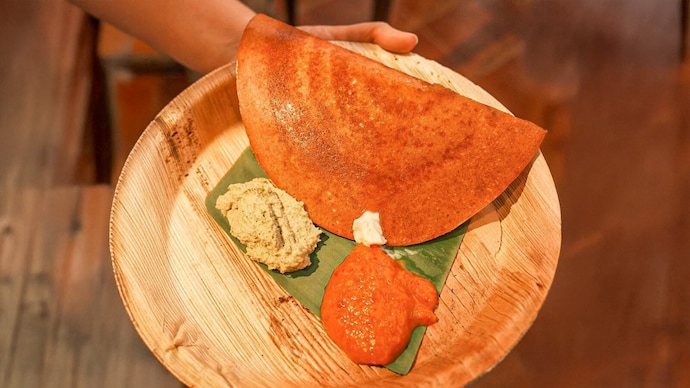
There’s something incredibly satisfying about making crisp, golden dosas at home but the real secret lies in the batter. A well-made dosa batter is light, slightly tangy, and perfectly fermented, giving you that signature texture and taste. If your dosas turn out too thick, pale, or lacking crispness, the issue is usually in the batter. Here’s a detailed guide to help you get it right every single time.
CHOOSE THE RIGHT RICE AND DAL FOR PERFECT TEXTURE
The foundation of a good dosa batter starts with selecting the right ingredients. Traditionally, a 3:1 ratio of rice to urad dal (split black gram) works best. For optimal results, use a combination of regular raw rice and parboiled rice (idli rice)—this gives dosas both crispiness and structure.
Urad dal plays a crucial role in fermentation and softness, so always choose fresh, good-quality dal. You can also add a teaspoon of chana dal for a slight golden colour and enhanced flavour. Avoid old or stale ingredients, as they can affect fermentation and taste.
SOAK INGREDIENTS PROPERLY FOR BETTER FERMENTATION
Soaking is not just a prep step it directly impacts how well your batter ferments. Soak the rice and dal separately for at least 4 to 6 hours, or overnight if possible.
Add teaspoon of methi (fenugreek) seeds to the dal while soaking. These seeds help improve fermentation, add a subtle aroma, and contribute to that beautiful golden-brown colour when the dosa is cooked. Proper soaking softens the grains, making them easier to grind and improving the overall batter quality.
GRIND THE BATTER TO THE IDEAL CONSISTENCY
Grinding is where the magic begins. The texture of your batter determines whether your dosa turns out crispy or chewy.
Grind the urad dal into a smooth, fluffy, and airy paste
Grind the rice slightly coarse (grainy, not completely smooth)
This contrast in textures is key. It creates a batter that spreads well on the tawa while still giving a crisp finish. Use cold water while grinding to prevent overheating, especially if using a mixer grinder. Overheating can kill natural bacteria needed for fermentation.
Also, avoid adding too much water the batter should be thick but pourable, similar to pancake batter.
GET THE FERMENTATION JUST RIGHT
Fermentation is the heart of dosa batter. Once ground, mix the rice and dal batter thoroughly using your hands this helps incorporate natural bacteria and kickstarts fermentation.
Cover the batter and keep it in a warm place for 8 to 12 hours (or longer in winters). After fermentation, the batter should:
Increase in volume
Look slightly bubbly and airy
Have a mild tangy aroma
In colder climates, you can place the batter inside an oven with the light on or wrap the container in a warm cloth. Poor fermentation often leads to flat, tasteless dosas, so don’t rush this step.
ADD SALT AND ADJUST BEFORE COOKING
Salt plays a subtle but important role. In warmer weather, it’s best to add salt after fermentation to avoid slowing down the process. In cooler temperatures, you can add it before fermenting.
Before making dosas, check the consistency of the batter. If it’s too thick, add a little water to achieve a smooth, flowing consistency that spreads easily on the pan.
Always use a well-heated tawa (preferably cast iron), lightly greased, and spread the batter in circular motions for that classic thin dosa.
Perfect dosa batter isn’t complicated it just requires the right balance of ingredients, patience, and technique. Once you master these basics, you’ll be able to enjoy restaurant-style dosas at home, customised exactly to your taste—crispy, soft, or somewhere in between.
With these tips, your dosa game is about to level up crispy edges, golden colour, and that irresistible flavour in every bite.
There’s something incredibly satisfying about making crisp, golden dosas at home but the real secret lies in the batter. A well-made dosa batter is light, slightly tangy, and perfectly fermented, giving you that signature texture and taste. If your dosas turn out too thick, pale, or lacking crispness, the issue is usually in the batter. Here’s a detailed guide to help you get it right every single time.
CHOOSE THE RIGHT RICE AND DAL FOR PERFECT TEXTURE
The foundation of a good dosa batter starts with selecting the right ingredients. Traditionally, a 3:1 ratio of rice to urad dal (split black gram) works best. For optimal results, use a combination of regular raw rice and parboiled rice (idli rice)—this gives dosas both crispiness and structure.
Urad dal plays a crucial role in fermentation and softness, so always choose fresh, good-quality dal. You can also add a teaspoon of chana dal for a slight golden colour and enhanced flavour. Avoid old or stale ingredients, as they can affect fermentation and taste.
SOAK INGREDIENTS PROPERLY FOR BETTER FERMENTATION
Soaking is not just a prep step it directly impacts how well your batter ferments. Soak the rice and dal separately for at least 4 to 6 hours, or overnight if possible.
Add teaspoon of methi (fenugreek) seeds to the dal while soaking. These seeds help improve fermentation, add a subtle aroma, and contribute to that beautiful golden-brown colour when the dosa is cooked. Proper soaking softens the grains, making them easier to grind and improving the overall batter quality.
GRIND THE BATTER TO THE IDEAL CONSISTENCY
Grinding is where the magic begins. The texture of your batter determines whether your dosa turns out crispy or chewy.
Grind the urad dal into a smooth, fluffy, and airy paste
Grind the rice slightly coarse (grainy, not completely smooth)
This contrast in textures is key. It creates a batter that spreads well on the tawa while still giving a crisp finish. Use cold water while grinding to prevent overheating, especially if using a mixer grinder. Overheating can kill natural bacteria needed for fermentation.
Also, avoid adding too much water the batter should be thick but pourable, similar to pancake batter.
GET THE FERMENTATION JUST RIGHT
Fermentation is the heart of dosa batter. Once ground, mix the rice and dal batter thoroughly using your hands this helps incorporate natural bacteria and kickstarts fermentation.
Cover the batter and keep it in a warm place for 8 to 12 hours (or longer in winters). After fermentation, the batter should:
Increase in volume
Look slightly bubbly and airy
Have a mild tangy aroma
In colder climates, you can place the batter inside an oven with the light on or wrap the container in a warm cloth. Poor fermentation often leads to flat, tasteless dosas, so don’t rush this step.
ADD SALT AND ADJUST BEFORE COOKING
Salt plays a subtle but important role. In warmer weather, it’s best to add salt after fermentation to avoid slowing down the process. In cooler temperatures, you can add it before fermenting.
Before making dosas, check the consistency of the batter. If it’s too thick, add a little water to achieve a smooth, flowing consistency that spreads easily on the pan.
Always use a well-heated tawa (preferably cast iron), lightly greased, and spread the batter in circular motions for that classic thin dosa.
Perfect dosa batter isn’t complicated it just requires the right balance of ingredients, patience, and technique. Once you master these basics, you’ll be able to enjoy restaurant-style dosas at home, customised exactly to your taste—crispy, soft, or somewhere in between.
With these tips, your dosa game is about to level up crispy edges, golden colour, and that irresistible flavour in every bite.

